12 Methods to Fix the No Internet Secured Issue on Windows

Updated on September 11, 2024

No internet secured is a common network connection error on Windows desktops that pops up when the device is unable to access the internet data. This issue isn’t related to any software bug or glitch. A multitude of factors, like lack of storage in DNS memory, network drivers, VPN usage, corrupt IP address issues, and misconfigurations in settings, can trigger this malfunction on Windows.

No internet, secured issue

This is a minor issue that can be easily resolved at home without the assistance of a technician. We’ve mentioned twelve methods that will help you fix the no internet secured problem in the easiest way possible.

1. Shorten the Router to Device Distance

One of the most common reasons for the no internet secured issue in Windows desktops is the inability to transfer the network data to the device. This happens when the device is kept at a longer distance than the coverage area of the Wi-Fi router. Although the device connects to the Wi-Fi connection, it will be unable to access the internet data. 

To solve this issue, you can follow either of the following methods: 

  • If you have a laptop that can easily be moved from one place to another, try setting it in a place closer or even next to the router. 
  • Computer setup that can not be moved to another place, so try installing the router near your setup or invest in a router with a wider range of connections. You can also invest in extended antennas to direct the range of your Wi-Fi network. 

While setting your router, make sure that it is placed in the center of your house and away from walls, metal objects, and the floor. 

2. Restart the Device and Router

It might sound too simple but restarting your device can be a great way to fix the no internet secured issue. Try to restart your computer, as it clears all the files running in the background that might be causing this issue and gives your device a fresh start.

Along with it, you can also try to restart your router. It refreshes the connection to your ISP (Internet Service Provider). Do either of the following steps to restart your router. 

  • Press the power button of your router (if available). Wait for a few minutes and again, press it. 
  • Simply unplug the adapter cable of the router and replug it after a few minutes

It refreshes the memory storage of the router and improves the speed of the network. 

3. Use Network Troubleshooter

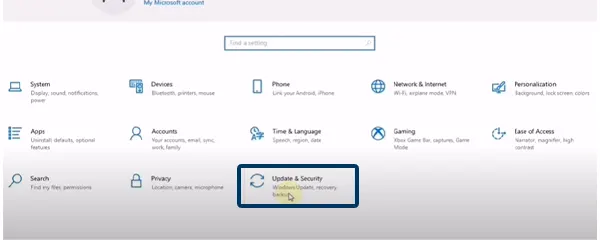
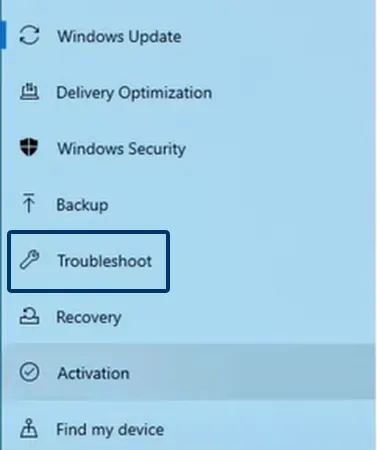
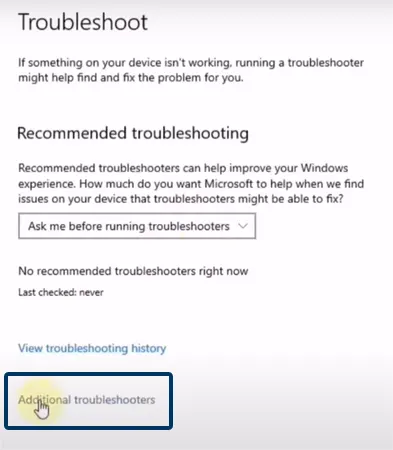
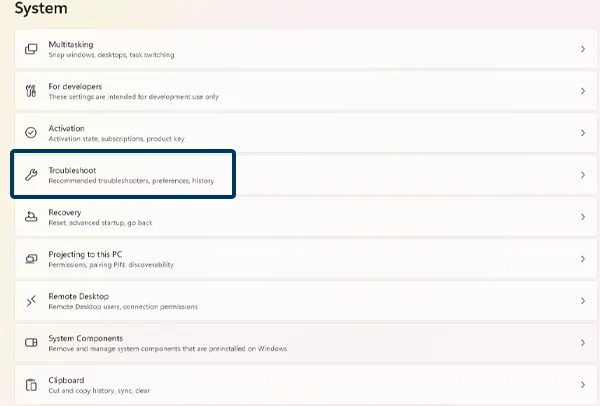
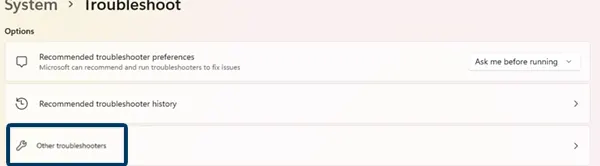
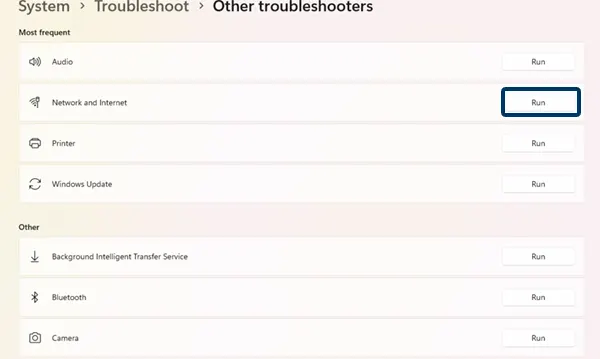
While facing any issue with the network, even the technician prefers to first go through the network troubleshooting process. It discovers connectivity, security, and performance issues in the network and provides steps to resolve detected issues. Using the network troubleshooter can be effective in resolving the no internet secured issue. Just follow these instructions to start the network troubleshooter test on your computer: 

Windows 10:

  • Open settings by pressing the window key + I.
  • Click on the Update and Security option. 
    Update and Security
  • Navigate and click on the Troubleshoot option in the navigation bar
    Troubleshoot option in Windows 10
  • Scroll down and click on “Additional troubleshooters.”
    Additional troubleshooter on Windows 10
  • At last, run the troubleshooter of the Internet Connections and follow the instructions provided by the troubleshooter.  
    Internet Connections troubleshooter on Windows 10

Windows 11:

  • Press the Windows key + I to open settings. 
    Home page of settings on Windows 11
  • Navigate and go to the “System settings” in the navigation bar
    Windows 11 System Settings
  • Now open the Troubleshoot and select the Other Troubleshooters option.
    troubleshooter
    Other troubleshooter options on Windows 11
  • Lastly, run the network and internet troubleshooting test and follow all the instructions provided by the troubleshooter.  
    Network and Internet troubleshooter test

4. Release and Renew your IP Configurations 

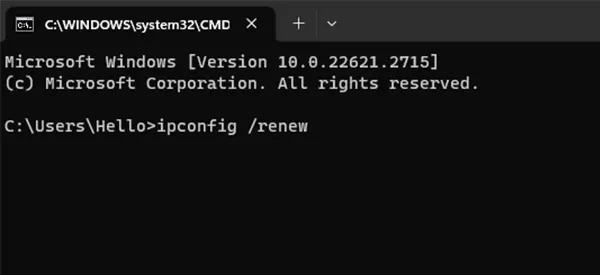
The no internet secured issue can also be activated due to the use of an invalid IP address. This happens when your device is allocated an IP that restricts Internet connections. 

The only way to get out of this situation is to release and renew the IP address on your device. It allocates a new IP address to your device. The following steps will help you release and renew the IP address of your computer. 

  • Press the Windows key + R to open the Run Command Panel, type cmd, and press the Enter Key
    Run command panel
  • Type the release IP prompt, ipconfig /release, in the command prompt panel
    IP address release prompt on Windows
  • Once the IP is released, type “ipconfig /renew” to allocate your computer a new IP address.
    IP address renew prompt on Windows 11

5. Disable Your VPN

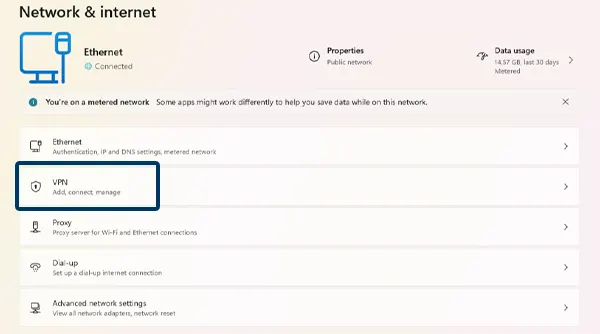
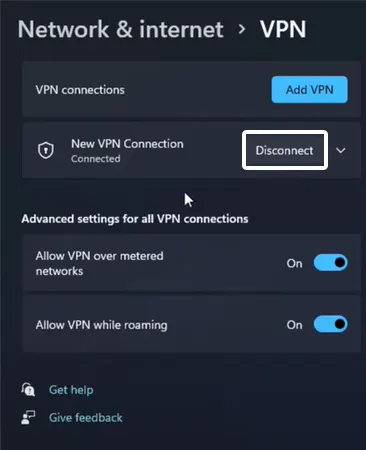
Using a VPN connection can also lead to no internet secured pop-up. It happens when you are connected to a VPN via Windows VPN or software and the kill switch disables your connection due to no connectivity to the VPN server. 

To solve this, try disabling your VPN. Here are the steps to disable your VPN:

  • Press the Windows Key + I to open settings. 
    home page of settings on Window 11
  • Navigate the Network and Internet in the navigation bar of settings. 
    Network and Internet settings on Windows
  • Now, open the VPN.
    VPN settings on Windows 
  • Click on the connected VPN and hit the disconnect button
    Disconnecting VPN on Windows 11

6. Flush Your DNS Cache 

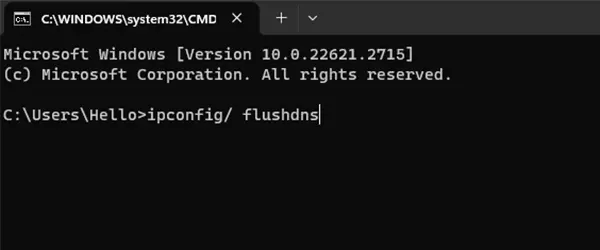
The stored data of your IP address can also be a potential cause of the no internet secured issue. This occurs when your DNS cache storage gets full and there is no more space. Apart from this, flushing the DNS cache can also resolve internet connection issues and DNS spoofing. 

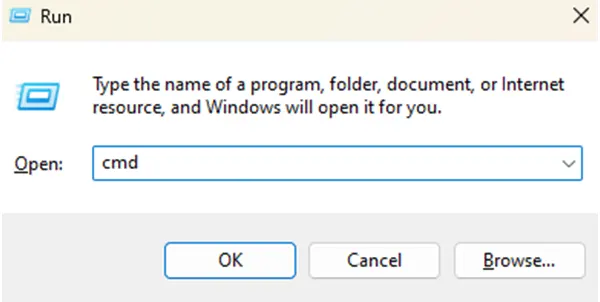
Here are the steps to flush the cache memory of your DNS.  

  • Press the Window Key + R to open the Run Command Panel.
    Run commands panel
  • Type “cmd”, and hit OK to open the Command Prompt Panel. 
    Run command panel
  • After the Command Panel is opened, type the prompt for clearing the DNS cache (ipconfig/ flushdns).
    flushdns prompt on Windows 

7. Implement Winsock Reset 

If the no internet-secured issue has resulted from any network issue, the Winsock reset command can be effective in resolving it. It stands for Windows Sockets API, which maintains and controls the connection between your computer and network connections. 

The following are the steps to perform the Winsock reset:

  • Open the Run Command panel, type “cmd’, and hit OK
    Run command panel
  • After the Command Panel is opened, type “netsh winsock reset” and hit Enter
    winsock reset command prompt

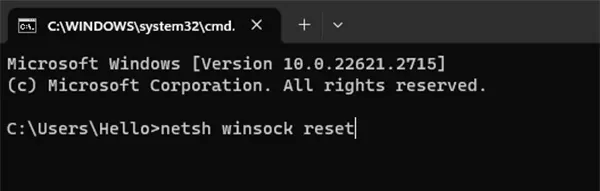
This will reset your network connections. Check if the issue still occurs after manually connecting to your network connection.

8. Restart the Network Setup Service

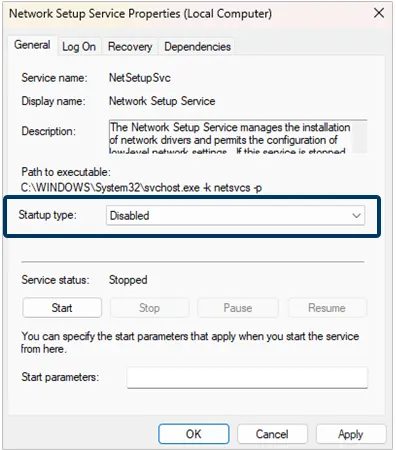
If the other devices connected to the network connection are not facing the no internet secured problem, it means that your device has a connection issue. This can happen due to corrupt files in the Network Setup Services. You just need to restart these services on your computer. 

1. Using Restart Option 

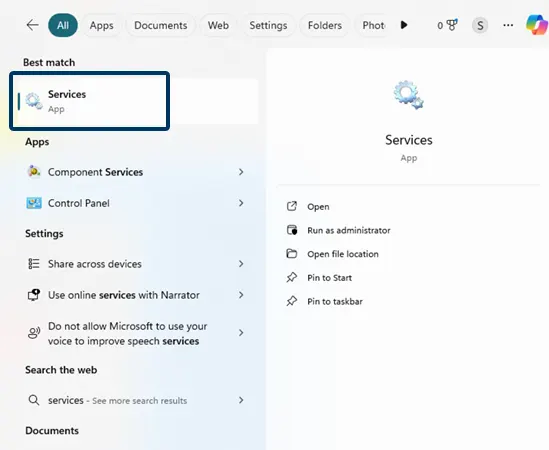
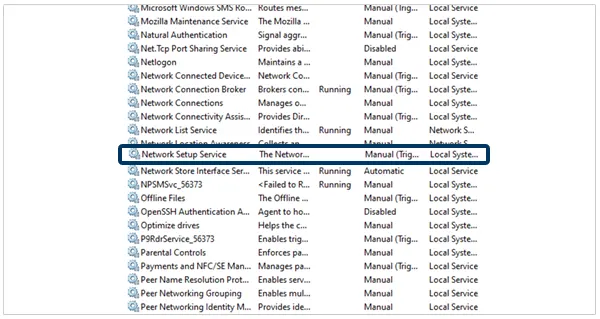
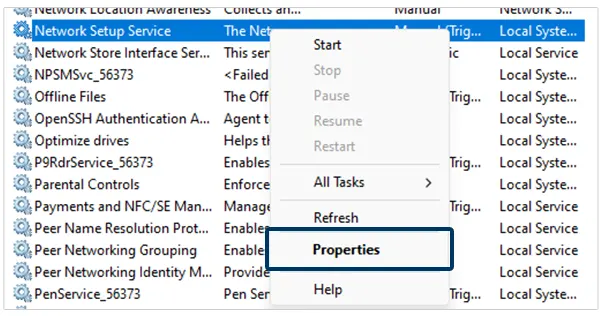
The following are the steps to restart the Network Setup Services on your Windows computer:

  • First, type Services in the Microsoft search bar and click on the Services application
    Services application on Windows 11
  • Now navigate and left-click the Network Setup Services
    Network Setup Services on Windows 
  • Lastly, left-click on the Restart option in the top left corner of the setting’s window
    Restarting the Network Setup Services 

2. Using the Start Option 

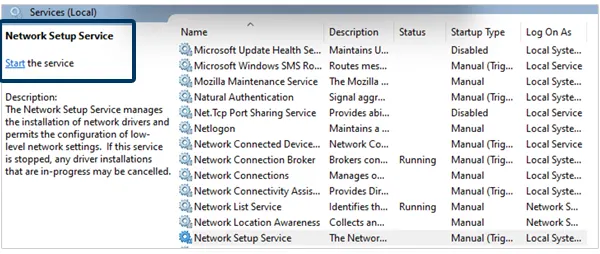
If the Restart option is not showing, instead only a Start option is displaying, which means that the Network Setup Services are off on your computer. Follow these steps to turn it on. 

Starting Network Setup Services on Windows
  • Right-click on the Network Setup Service, and click on the Properties option. 
    Properties of Network Setup Services on Windows
  • Now, change the Startup Type to Automatic.
    Changing the Startup type of Network Setup Services
  • Once the Startup type is set, hit the Start option in the Service Status section. 
    Start option of the Network Setup Services 
  • At last, hit Apply, followed by OK option.
    Applying changes in Network Setup Services

9. Update the Network Drivers

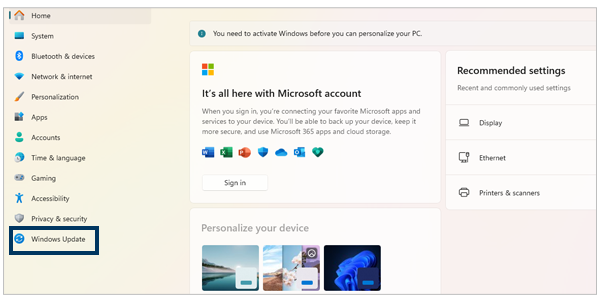
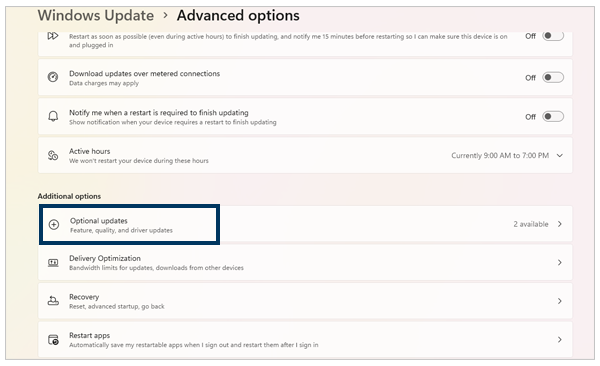
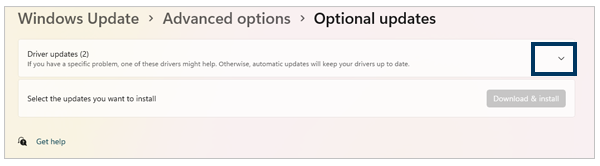
These are the software programs that act as a bridge between devices and network connections to maintain a stable, functional connection. Outdated network drivers can be a reason for the no internet-secured issues in your computer. 

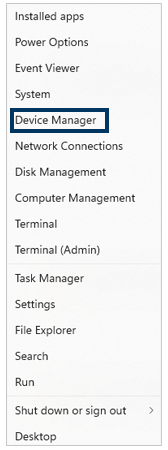
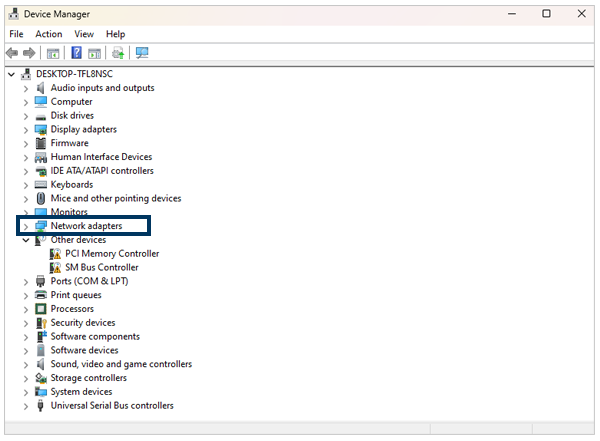
Follow these steps to update your network drivers: 

  • Press the Windows Key + I to open your device settings and navigate to the Windows Update
    Windows Update option on Windows 11
  • Scroll down and click on Advanced Options
    Advanced window Update option in Windows 11
  • Again, scroll down to locate and open the Optional Updates
    Optional updates on Windows 11
  • Now, hit the drop-down arrow. 
    Driver updates on Windows 11
  • Select all the updates and hit the “Download & install” option. 
    Download and install options on Windows 11

10. Reinstall the Network Drivers 

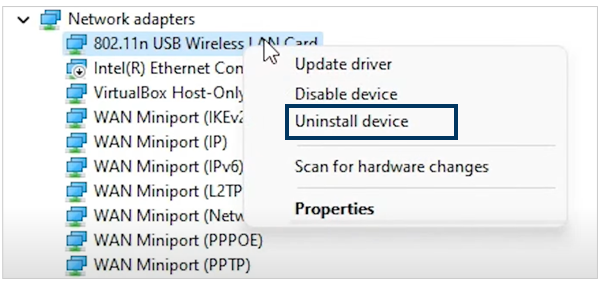
If updating the network driver of your computer doesn’t help, maybe uninstalling and installing might work. This solves most of the issues related to network connections and the internet. 

Follow these steps to reinstall the network drivers of your computer: 

  • Right-click on the Windows icon, available on the taskbar.
    Window Context Menu options
  • Once the Windows Context Menu is opened, left-click on the Device Manager
    Device Manager in Windows Context Menu
  • After the Device Manager Panel is opened, navigate to Network Adaptors and left-click on “>.”
    Network adapters in Device Manager 
  • Now locate and right-click on your wireless connection driver and hit “Uninstall device.” 
    Uninstalling driver
  • Make sure to allow removing the driver from the device by left-clicking the box, followed by hitting the Uninstallation option. 
    Uninstalling wireless network driver
  • Once the driver is uninstalled, go to Action in the menu bar.
    Action tab in the menu bar of the Device manager
  • Lastly, locate and click the Scan for Hardware Changes option to reinstall the driver. 
    Scan for hardware changes option on Windows

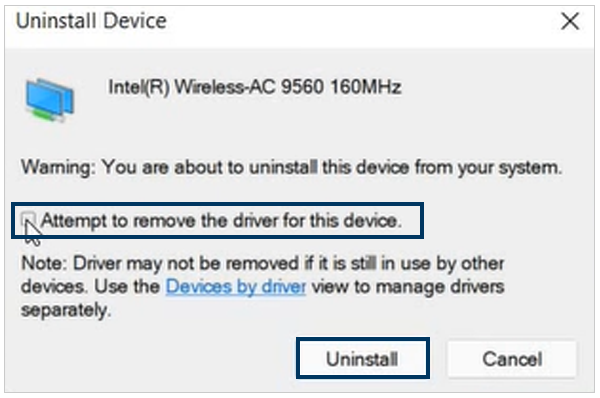
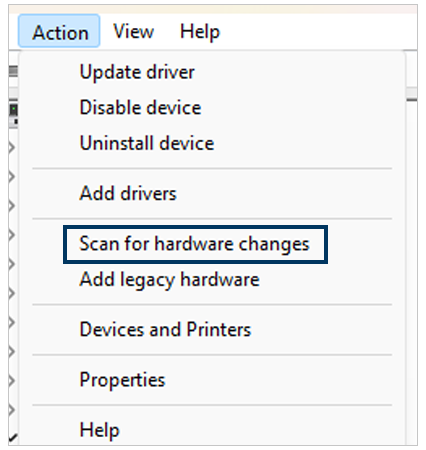
If the wireless network driver doesn’t get installed after scanning for hardware changes, try restarting your computer. 

11. Change DNS Server 

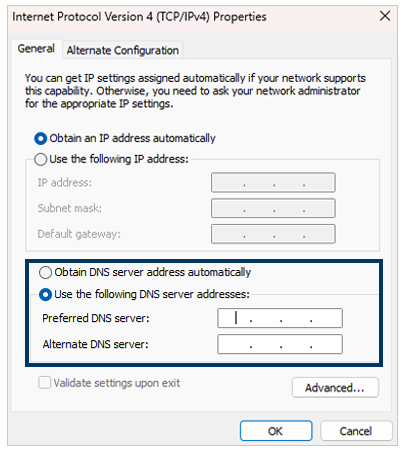
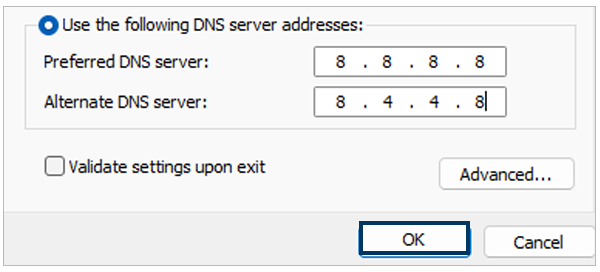
Sometimes, the pre-assigned DNS server of your ISP or Internet Service Provider has faults that can lead to restricting the users from accessing the Internet connection, resulting in no Internet secured. In this situation, the only solution left is changing your DNS server. 

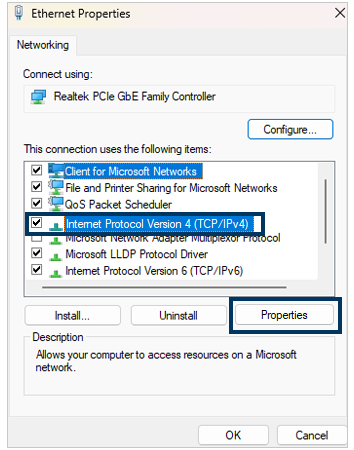
The following are the steps for changing the DNS server of your internet connection: 

  • Open the Run Command Panel by pressing the Windows Key + R
    Run command panel
  • Type the control panel and hit OK or press the Enter key
    Control panel command in the run command panel 
  • Now open the Network and Internet
    Network and Internet settings on Windows 11
  • Left-click on the Network and Sharing Center
    Network and Sharing Center option on Windows settings
  • Once the Network and Sharing Center is open, navigate to the Change adapter settings on the left navigation panel.
    Change adapter settings on Windows settings
  • Right-click on your connection and go to the properties
    Internet connection properties on Windows 
  • After the properties of your network connection are opened, left-click on the Internet Protocol Version 4 (TCP/IPv4) and hit the properties button. 
    properties option of Internet protocol version 4 
  • Left-click on the Use the following DNS server addresses.
    Manual DNS server on Windows 
  • Enter the following DNS codes of the Google DNS server.
    • 8.8.8.8

    • 8.4.4.8
    • Google’s DNS code on Windows 

12. Reset the Network Settings to Default

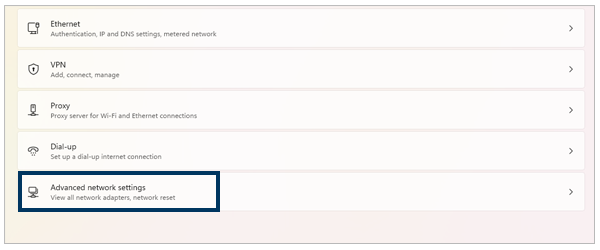
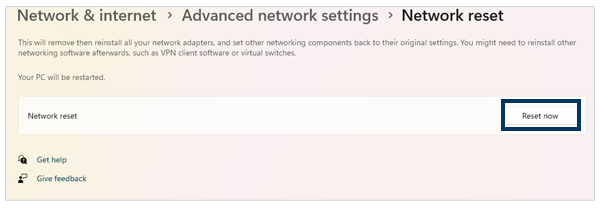
If you have tried all the aforementioned methods and the no internet secured issue persists, you should resolve it by resetting the network settings. Doing this will clear all the changes made to the connection and reset the connection to its default settings. 

The following are the steps to reset your network settings to default: 

  • Press the Windows Key + I to open the device settings and open the Network and internet
    Network and Internet settings on Windows
  • Now, navigate to the Advanced network settings
    Advanced network settings on Windows 11
  • Scroll down and locate the Network reset option in the More settings section.
    Network reset option on Windows 11
  • Lastly, left-click on the Reset Now button on the Network rest
    Network reset now button on Windows 11

Wrapping Up

The no internet secured issue can be extremely annoying for users, as there is no single reason for it happening. It can appear on your computer due to various reasons, like misconfiguration in device settings and network settings. Thus, we prefer you to imply more than one method to resolve the no internet secured issue. 

Frequently Asked Questions
Why does the no internet secured issue appear in Windows? 

The no internet secured issue displays on the connected network connection due to the inability to access the Internet. Once the device gets access to the internet connection, the no internet secured message changes to “Connected, Secured”. 

Can I directly try resetting my network without trying other methods? 

Yes, you can reset your network to defaults before trying any other methods. But trying other methods before resetting the network is preferred, as leads to clearing all the Bluetooth, Wi-Fi, and VPN memory data. 

Does changing the DNS server make a device vulnerable to online threats? 

No, it doesn’t make your device vulnerable to any online internet threats, but changes the way your device resolves domain names. 

Brandon Glover

Follow Me:

Related Posts